Basic Tutorial
Top  Previous  Next

clip0363


Create a new project in Seasonal Source

1. Create a Project.

Select File | New Project

h2  


2. Import Image

Click anywhere on the large green/yellow surface to begin the image import process.

clip0568


3. Click on the OK button if you imported your own image.

clip0211


4. Select Image File

Select an image to import. Click the OK button to finish the import.

Notes: Seasonal Source will accept many different image file types such as .BMP, .PNG, .GIF, .JPEG and many more.


5. Design Surface

Your imported image will be displayed on the design surface.

(workspace after importing image)
h1

You can change the view by using the buttons in the "Change View" box. Use the buttons to control the zoom, pan and rotation of the view.
clip0569


6. Scale Lights

You'll need to scale the lights in proportion to the image.

The first time the image is clicked on, a Door Scaler Image will appear at the mouse location clicked.

(Scaler image)
clip0228  


7. Scale

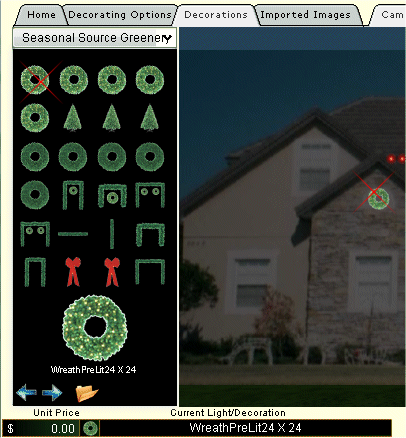
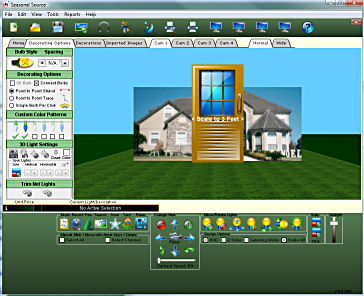
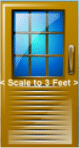
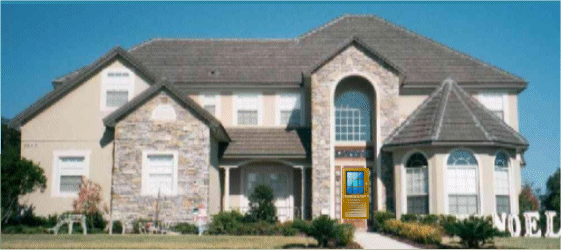
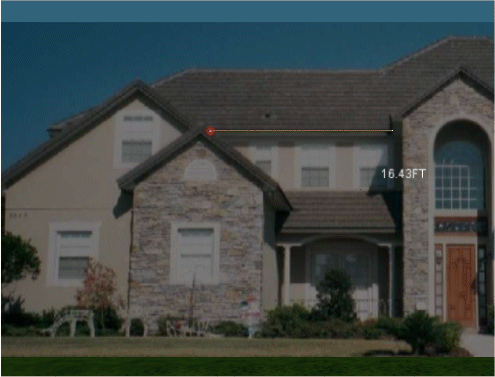
Use the Scale Buttons to reduce the size of the scaler image to match approximately 3 feet of your image. A typical door is about 3 feet and makes an excellent reference.  
 
(scaled to 3 feet using front door of the house as a reference)  
clip0229  
 
(scale buttons)
clip0571  


8. Delete Scaler Image

Right Click over the Scaler Image and select "delete" remove it. If you need it again, right click over the design surface and select "get scaler".


9. It's Time To Decorate!

The next few items cover Choosing Lights and adding them to your project.


10. Choose Light Type

Click on the Bulb Style button clip0489 and choose a decorating option. In this example, it is Lights | C9 Bulbs | C9 Red . This will set Red C9 Bulbs as the current selection.

(select C9 red bulbs from menu)
clip0572  
 
clip0573  

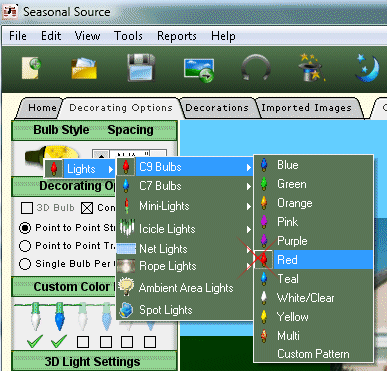
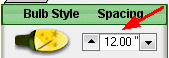
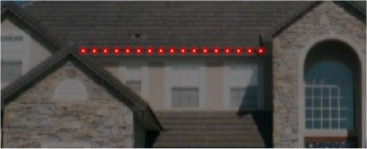
   C9 Bulbs default to 12" bulb separation but you can set this to whatever you need. We will keep this setting for the tutorial.  

clip0574  

The Light Selection Display shows the last light, type and unit price.

(Current Light Selection)
clip0575


11. Modifying the Daylight Setting

The Day/Night slider on the right side of the screen controls the amount of daylight in the design.

clip0576


12. Add Lights

With the light selection set to C9 Red, it's time to start adding lights to the design.

Step A: With C9 Red lights still the active selection, click on the design canvas where you want your strand to start. The red "X" will appear indicating you need to click on the design canvas a second time to end the strand. You can cancel the strand at anytime by clicking on the red "X". For this exercise do not click the "X.

Step B: Choose an end point for your strand by clicking on your design.

clip0577  
 
clip0578  
 
Repeat Steps A and B to add more lights to your design.

Click on the "Decorations" tab to add Seasonal Source Decor to your design.

clip0579

Click the top of the decorations area to switch libraries.

clip0580

clip0581

This concludes the tutorial.